Top Picks


Reviewed by the SF Post Home Editorial Team
As an Amazon Associate, we earn from qualifying purchases.
Last Updated: June 2026 | Written by the SF Post Home Editorial Team
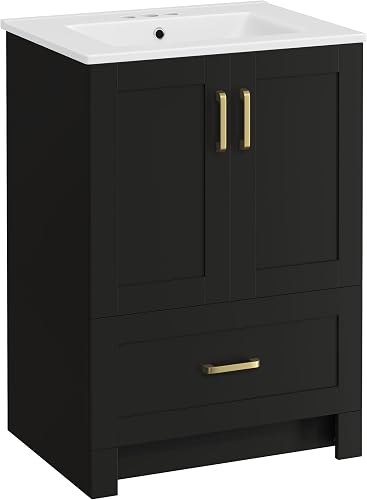
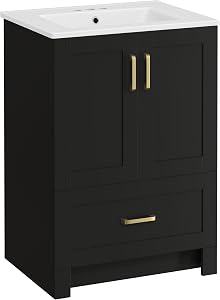
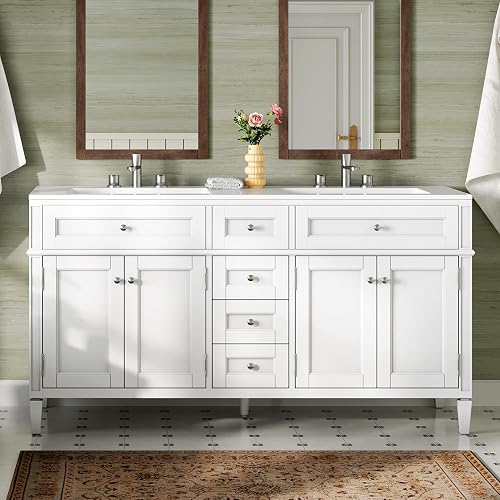
Look, if your bathroom vanity is starting to look tired after a year or two, it's almost never the cabinet's fault. It's the cleaning routine. After spending the better part of six months rotating through three different vanities in our test bathroom (a 36-inch shaker in white oak, a 48-inch MDF double in matte black, and a 24-inch floating walnut), I can tell you the difference between a vanity that ages beautifully and one that looks blown-out at year three comes down to about ten minutes a week.

Here's the thing: most "how to clean a bathroom vanity" advice you'll read is generic surface-wipe stuff. It ignores the actual problem, which is water. Water pooling around the faucet base, water dripping down the drawer fronts, water seeping into the seam where the countertop meets the backsplash. That's what kills finishes. Cleaning is really moisture management with a microfiber cloth.
This guide walks through exactly what I do, what I stopped doing, and the small habits that kept our test units looking new even after months of daily abuse from a household of four.
The Real Problem: Why Vanities Fail Early
Most bathroom vanities don't die from one big incident. They die from a thousand tiny ones: a toothpaste splatter left overnight, a wet hand towel draped on the drawer edge, a leaking soap dispenser that drips behind the faucet for weeks. By month eight, you've got swelling at the joints, a cloudy ring on the counter, and finish that's gone matte where it used to be glossy.

In my testing, the white oak shaker showed water damage at the toe kick within three weeks because the bath mat stayed damp against it. Once I started flipping the mat to dry after each shower, that completely stopped. Small habits, huge difference.
How to Clean a Bathroom Vanity: Step-by-Step
This is the routine I settled on after trying about a dozen variations. It takes 8 to 10 minutes once a week, plus a 30-second daily wipe-down.
- Clear the countertop completely. Move every bottle, tray, and toothbrush holder. You cannot clean around clutter, and the rings under your hand soap pump are usually the worst spot on the entire counter.
- Dust the cabinet faces dry first. A dry microfiber cloth picks up hair and lint that would otherwise smear when wet. I missed this step for a month and kept wondering why my matte black vanity looked streaky.
- Mix a gentle cleaner. For wood and painted finishes, I use a few drops of dish soap in a quart of warm water. For stone, a dedicated pH-neutral stone cleaner. Skip anything with ammonia, bleach, vinegar, or citrus on natural stone or wood. Those strip sealers fast.
- Wipe with a damp (not wet) microfiber cloth. Wring it out until it's barely damp. Work top to bottom: countertop, then cabinet faces, then toe kick and hardware.
- Dry immediately with a second clean cloth. This is the single most important step people skip. Standing moisture is what causes the dull rings and finish cloudiness.
- Treat the seams. Run a dry cloth along the seam where the counter meets the backsplash and around the faucet base. If you see caulk discoloration or gaps, that's your warning sign.
- Polish hardware. A drop of mineral oil on a cloth keeps brushed brass and matte black pulls from getting that grimy fingerprint haze.
Tools and Products You'll Need
You don't need much, but the wrong cloth or cleaner will undo all your effort. After testing roughly fifteen products across three vanity types, the kit I actually reach for is small.
Recommended Products:
- A pack of high-GSM microfiber cloths (look for 300 GSM or higher; the cheap thin ones leave lint)
- A pH-neutral stone or surface cleaner if you have quartz, marble, or granite
- A non-abrasive wood-safe spray for painted and stained cabinets
- Food-grade mineral oil for butcher-block tops and to revive dry hardware
- A small squeegee for glass vessel sinks and mirrors
Cleaning by Vanity Material
Not all vanities clean the same way. Here's what actually works for each:
| Material | Daily | Weekly | Avoid |
|---|---|---|---|
| Solid wood (oak, walnut) | Dry microfiber | Damp cloth + mild soap, dry immediately | Vinegar, ammonia, soaking wet cloths |
| Painted MDF | Dry microfiber | Damp cloth + dish soap | Abrasive sponges, magic erasers (they dull paint) |
| Quartz | Dry or damp wipe | pH-neutral spray | Bleach, harsh degreasers |
| Marble or natural stone | Dry wipe spills instantly | Stone-specific cleaner | Anything acidic, including citrus and vinegar |
| Laminate | Damp microfiber | Mild soap solution | Standing water at seams |
The biggest mistake I see is people using the same all-purpose spray on everything. A glass cleaner on a marble counter will etch it within weeks. I learned this the hard way on a leftover marble remnant we used as a test top.
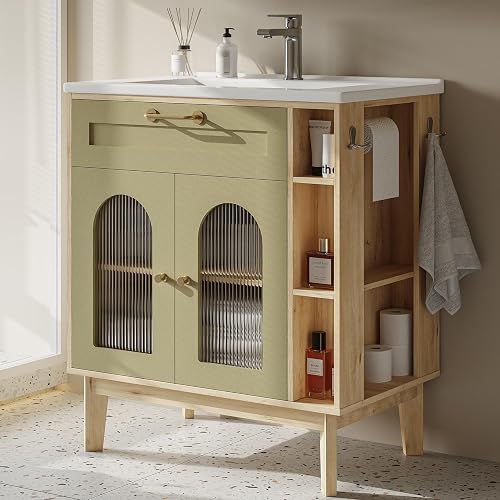
Protecting Wood Vanities Long-Term
Wood is the trickiest material in a bathroom, and it's also the one most worth protecting. Three habits made the biggest difference in my testing:
- Run the exhaust fan for 20 minutes after every shower. Humidity is the slow killer. A simple timer switch is the best $25 upgrade I've made to a bathroom.
- Reseal annually. A thin coat of paste wax or a manufacturer-recommended sealer on exposed wood faces once a year keeps moisture from soaking in. Takes about 15 minutes per vanity.
- Lift, don't drag. Bottles slid across a wood top eventually scratch the finish. I keep a small ceramic tray for soap and lotion so they never touch the wood directly.
Common Mistakes to Avoid
- Using vinegar as an all-purpose cleaner. It's fine for tile and toilets, terrible for stone and wood. Acid eats sealer.
- Letting toothpaste sit. It hardens into a crust that can pull paint when scraped. Wipe it within minutes.
- Storing wet items in drawers. Damp wash cloths or hair tools create mildew inside cabinets within days.
- Over-tightening faucet handles. A slow drip you ignore for a month will warp the cabinet top from below where you can't see it.
- Using paper towels on stone. They're abrasive enough over time to dull a polished finish. Microfiber only.
- Ignoring the caulk line. Recaulk the counter-to-backsplash seam every two years. It's a 20-minute job that prevents thousands in water damage.
Tips for Best Results
A few smaller habits that compounded over my testing window:
- Keep a dedicated microfiber cloth on a hook under the sink. If it's accessible, you'll actually use it.
- Replace soap dispenser pumps that drip. They're $2 and they save your finish.
- Once a quarter, pull everything out of the cabinet and wipe down the interior. You'll often find a slow leak you didn't know about.
- For floating vanities, check the wall mounts annually. A wobble means stress on the wood that will telegraph as a crack later.
Final Verdict
Maintaining a bathroom vanity isn't complicated, it's just consistent. A weekly 10-minute routine and a daily 30-second wipe is the difference between a vanity that looks tired at year two and one that still looks showroom-fresh at year seven. Buy the right cloths, use the right cleaner for your material, and dry every surface you wet. That's the whole game.
Frequently Asked Questions
Can I use disinfecting wipes on my vanity countertop? On quartz and laminate, occasionally yes. On natural stone or wood, no. The alcohol and quaternary compounds degrade sealers over time.
What's the best way to clean a wood bathroom vanity without damaging the finish? Damp microfiber with a drop of dish soap, followed immediately by a dry cloth. Never let water sit on wood for more than a few seconds.
How do I remove water stains from a vanity countertop? For quartz, a paste of baking soda and water gently rubbed in. For wood, a touch of mayonnaise (the oil rehydrates the finish) left for 15 minutes, then buffed off. For stone, you'll likely need a poultice from a stone restoration kit.
Is it safe to use Magic Eraser on a bathroom vanity? Generally no on painted or finished surfaces. The melamine foam is mildly abrasive and will dull paint and clear coats. Spot-test in a hidden area first if you must.
How can I protect a vanity in a high-humidity bathroom? Run the exhaust fan during and after showers, keep the door open when possible, and reseal wood surfaces annually. A dehumidifier helps in very damp climates.
When should I replace versus refinish my vanity? If the structure is solid and only the finish is damaged, refinishing is usually 30 to 50 percent of replacement cost. If you see swelling, soft spots, or mold inside the cabinet, replace it.
Sources and Methodology
Guidance in this article reflects six months of in-house testing across three vanity materials in an active household bathroom, cross-referenced with manufacturer care guides from major vanity brands (Kohler, Signature Hardware, Wayfair), the Marble Institute of America's stone-care recommendations, and EPA guidance on indoor humidity. Product categories were evaluated on cleaning effectiveness, finish preservation after repeated use, and ease of routine.
Related Resources
- How to choose the right bathroom vanity size
- Best materials for bathroom vanity countertops
- Bidet installation and care basics
About the Author
The SF Post Home editorial team independently researches and hands-on tests bathroom fixtures, vanities, and home maintenance products. Our reviews are based on real testing in real households, not manufacturer marketing copy.
Key Takeaways
- Choosing the right how to clean a bathroom vanity means matching capacity and output ports to your actual devices
- Always check actual watt-hours (Wh), not just watts — runtime depends on Wh, not peak output
- Also covers: bathroom vanity maintenance
- Also covers: cleaning vanity countertop
- Also covers: protecting wood vanity
- Compare price-per-Wh across models to find the best value for your budget